When finding out what the first project was, I decided I would like to do it by myself. I wanted to do the project by myself to challenge myself. I wanted a challenge cause throughout the first two trimesters all the large projects were done in groups, in which sometimes I feel I didn’t get the chance to participate as much as I would have liked. I am also very interested in what the final result will be when I am working by myself, as in past projects when working in a group, we had a lot of troubles with organisation and having a proper end result.
My idea for the project is to record a song for an artist, add synth, then team up with a film student and produce a music video. I got on board one film student (Alex Balaskas) and she has said she is very keen to help out on the project, which was very useful as I already had a partner from the very start of the project. I also got solo/acoustic guitar player Gianluca Garozzo for me to record and produce a song for him.
I met up with Gianluca to organise what we want to be completed by the end of week 6. We agreed that the song we were going to work with was a cover of Father John Misty’s ‘writing a novel’. He is going to play guitar and do vocals, whilst I will put drums into the song, and add synth. I will do all of the recording process by myself. When discussing with Alex, we agreed that the music video was going to be very basic. It was going to be a video of Gianluca walking around a nice environment, skateboarding, smoking etc.
With the chances of the original project plan not going happening, I made a back up project. The project would be very similar just without the music video. I would instead produce one song, and put a lot of work into the editing and mixing of the song. Whilst also putting more synth into it.
Throughout week one I didn’t build any progress on the actual project, though I did build on what I am going to and constructed a pretty strong project plan for the future of creating the project.
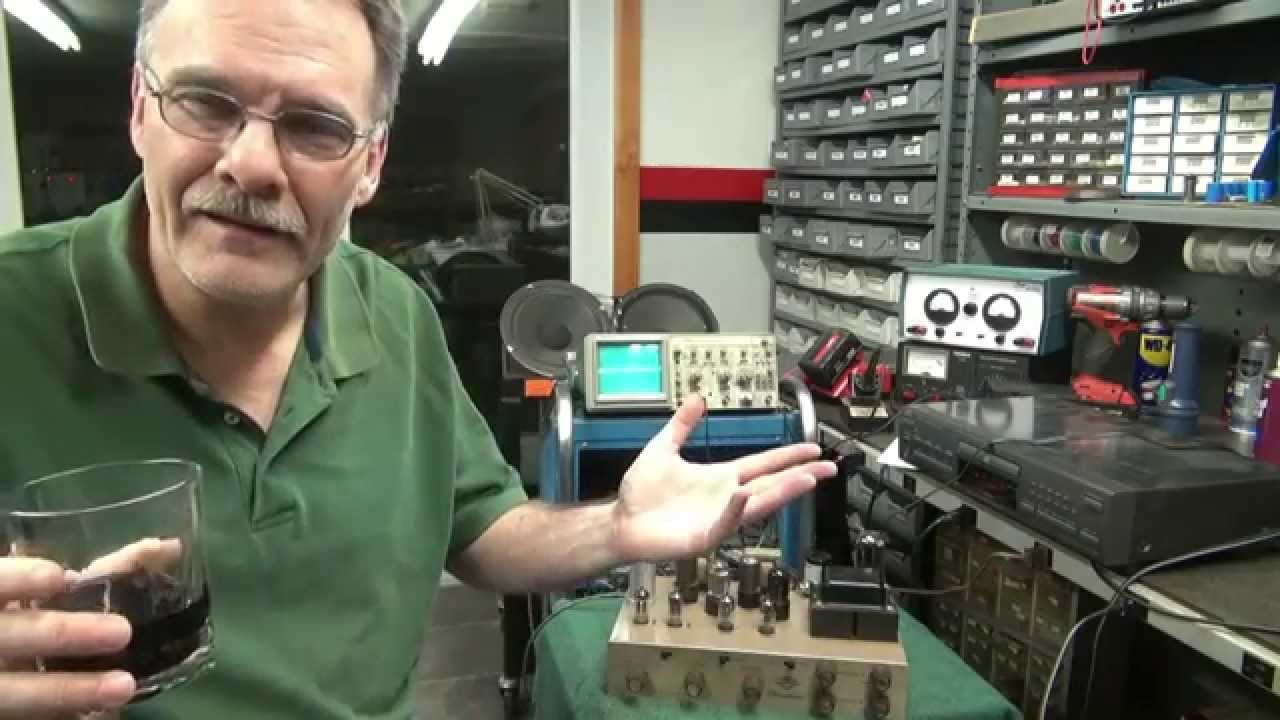
This blog is going to have a look into repairing audio. The example I am going to be using in this blog is a vocal track that I had, which had many unwanted clicks and pops, especially when the singer was singing up close into the microphone for the real intimidate parts of the song.
This is a look into how I edited vocals for a artist recently named Karen. We are beginning to work on a project over the next few months when I have my Uni break. I have done a few vocal takes, and recorded some guitar for her so far. This blog will look into how I edited the pops and clicks out of her vocals, and made her vocals sound a lot cleaner.
These are the vocal takes before and after on my soundcloud playlist: https://soundcloud.com/user-876278774/sets/karens-vocals-before-and-after-editing
The first plugin that I used was a noise gate. This tool gave me the chance to take away some of other unwanted noise between the vocals throughout the song. This is an easier way to do instead of just literally taking away the spots by editing each part, this would take way too much time. I ended up putting the threshold up a tiny bit, this gave was able to give me the chance to remove things such as when the singer hit the stand or his mouth hit the microphone. After I made sure I put the threshold back down so that I would be able to hear the full expression of the vocals.
I then used a iZotope’s RX plug in so I would be able to identify the parts throughout the vocals that did have these missing parts. I used this so I would be able to identify the parts I needed to remove. Once you have the noise stored, the plugin removes the set of frequencies from the mix. If you use this tool too much though, there is a definite chance that it will remove a lot of the colour out of the mix, so you must make sure you are able to find a good spot for it to be, or else the mix will be missing a lot of its characteristics.
I then used one of the settings on it I love, the de-plosive tool. This gives you the chance to remove many of these unwanted characteristics in the track you don’t want. There won’t a ridiculous amount of plosives in the track, so i processed the sound so the upper limiter reached around 120kHz, this got rid of a lot of these unwanted noises. Removing too much can definitely ruin the track though, so I found the right amount between these levels so the sound still sounded natural.
After this the track was sounding pretty good, could still hear a very small amount of the unwanted sounds but nowhere near as much that it didn’t sound natural anymore. After this I played around with a few effects such as reverb and delay, and was able to get the vocals sounding really good (though these steps don’t repair the vocals, just give it a niceer sound). All up using this method is a great way to get rid of some unwanted sounds in vocal tracks that tend to always be sitting there when you are mixing.
This video gives a great look into a similar way of doing this:
Mixing is 5.1 can offer a massive amount of flexibility for creative sound design and for mixing for television, games and music. It gives you the opportunity to really get creative with audio aspects that you work with. It can give the feeling of being at a live event, with aspects of the audio completely surrounding you. This blog will give a look into mixing in surround sound in pro tools.
To start off with mixing in surround sound, the best method is too make sure your room is calibrated properly. This will give you the chance to hear the surround sound properly and the best way possible. To have a look into how to calibrate your room so it is ready for surround sound mixing have a look at my blog: https://peteminnikinsblog.wordpress.com/2017/11/29/room-calibration/
The first step to mixing surround sound in pro tools you must have the correct set up in pro tools. The way I have done it is by sending my auxiliary tracks to a bus, which is then sent through the 5.1 master fader.
This image shows the standard set up, the first track is then sent through the 5.1 master fader, and then sent to another bus (e.g bus 5-6). The original sent of this is usually sent through a reverb plugin. After you have done this you then send the second track to be in a delay plugin, and then set its inputs to another bus (e.g 7-8).
You then Pan both of these tracks to the to the back of the room, which is why you want your room to be properly calibrated, this gives you the opportunity to use the back left and back right speakers.
Then for the final mix, you send your signals through the final auxiliaries that you have chosen (e.g 5-6. 7-8). You can decide how much you want going through both of these to get the complete feeling that you want. It is really up to you to decide, depending on the feeling that you feel is right for the final mix.
For a more in depth look which shows you some important tips on mixing surround sound I will leave a link at the bottom. Surround sound can give you a really good opportunity to express your work in a different way to a standard mix.
This link will give you a longer, more in depth look into surround sound mixing, and the importance on calibrating your room before you do anything:
Mastering is the final stage before you release your music to the world, making it extremely important. First of all, i’d like to state that mastering is a skill that I plan on improving on in the future, as currently it is not my biggest strength, and this is fine as mastering is skill that you develop the more you do it, but it is also a really important aspect of audio. This blog will give a look into the process I went into mastering a song for the EP I have currently just finished. The song that I will be talking about is Bloodshot Eyes, off the EP I have done for Billy Mcleod.
The first stage I used to mastering this song was an linear phase EQ. I wanted to bring a bit of brightness back into the track, as when I was mixing it took a bit of it out and made the mix sound a bit muddy. So I brought up the low end of the track, which brought some of the brightness back. As I had compressed the tracks in the original mix I did not want to bring any of the parameters up too high, as this could easily completely change the way that it sounds, in a bad way.
This video gives a great idea of what I mean:
I then used a multiband compressor as I knew it’d be able to give me strong/raw feeling to the mix. Multi band compressors are mainly used in mastering, but are not only limited for this use, as they are sometimes used in mixing. Using the multiband compressor I was able to make the subsonic unwanted frequencies and tame them, lowering the level of unwanted percussion sounds, and bring sounds such as the hi-hat into line. Using this tool is really good in compressing the sound of the audio, but not making it extremely evident.
Heres another video to give you an insight into multiband compression:
I then used a limiter to complete my mastering stages. I hadn’t really properly used a limiter before so this was an interesting final experience of my mix, I used the Sonnox Limiter a plugin that i’d never heard of or used before. I was able to use the limiter to bring out the loudness of the mix, and this was actually a really cool plugin. At first if I pushed the limiter too hard it would make some really unpleasant effects on my mix. You basically have to get limiters to a point where the mix is ‘transparent’, i’m not going to explain what that means but here is a blog defining it: https://www.gearslutz.com/board/mastering-forum/666181-transparent-limiters.html . Once I was able to get the mix ‘transparent’ , my mix was ready to go.
All up mastering is extremely important when you want to get a professional mix. Once again I am not the best at mastering, so don’t think this blog indentifies every aspect of mastering, but it is the process I used of mastering this song. Mastering can turn your songs into the best they can be, and this is really important when doing things like EPs, albums and basically anything professional in the audio world.
Having my major project due at the end of this week I thought it’d be a good idea to reflect on what has been one of the more interesting EP’s I have created for an artist. Through this process of creating the EP there has been a few bad moments, but all up I am pretty happy with the end result. This blog post will go into depth about everything that has happened during the process of creating the EP for Billy Mcleod, and how the project plan I had in place ended up working.
Firstly I will discuss one of the biggest low points of this project. Originally I was not planning to be working on this project with Billy Mcleod, I was originally using another artist who was keen to record an EP. The original artist ended up having to go to visit his family overseas for a few weeks, so there is no way I would have been able to do this project with him. This left me with negative one and a half weeks to what I should have had to get this project done, and honestly it was extremely stressful at this point. Having to find another artist, a figure out all the drums for the new artists songs was going to be a mission within itself, as I had already done it with the original artist, this was going to be a major issue. Thankfully my good friend Billy told me he’d be more then pleased to work on the project with me. My project plan did not have to change much at all for this, as the project was extremely similar to the one I had with the original artist. Looking back at this it honestly brought out some commitment skills in myself that I had not seen in a while.
With the shortened amount of time to do the project I knew I was going to have to get Billy into the studio as soon as possible. Booking multiple studio sessions at the start, Billy and I had to figure out drum patterns I was going to put over his music. With the guitar and vocals he plays not having extreme patterns, it gave me the opportunity to figure out some pretty basic drums beats/patters that’d suit his music. As this was the case I figured the best way to do this was to record all of Billy’s vocals and guitar first, for all of the songs. This would allow the chance to give myself a few extra sessions to figure out all of the drum patterns. Doing this ended up being the best way to do it, as once it came to recording the drums I was ready. It took two studio sessions to get the drums recorded for the songs. It did take a lot of takes to get them how we wanted, but this was definitely worth as I think we got the best ones possible.
Another large issue that I had with this project was the graphic design student I had working on the EP cover pulling out two weeks before the project was due (everyone pulled out on me in this project). This left me with two weeks to find a graphic design student to do the EP cover for the project. Thankfully this didn’t end up being to big of an issue as I ended up sourcing out a design student to do this online, and now I currently have two designs to choose from, now I just have to decide…
This are the two possible EP covers:
Billy and I are still trying to figure out which ones we want to use for the EP but we will definitely decide by the due date.
Overall this project has had its ups and downs but overall the result is pretty good for the amount of time we ended up having and the amount of people that pulled out on me. Billy and I are very keen to release this EP to the public, and hopefully Billy can gain some recognition for it. If you want to have a look at some of the issues I had when mixing the EP, look at this blog: https://peteminnikinsblog.wordpress.com/2017/12/11/performance-correction-guitar-recordings/
Loudness standards is an incredibly important part of audio, especially with multi media contents such as audio for TV and movies. It is always extremely important to measure loudness before it is sent for release, for all types of audio media. The international telecommunication unions BS.1770 high recommendation is international and is basically the most important broadcast standard as most standards are based on it (Transom, 2016). The ITU standards concerns broadcast loudness and true-peak levels of measurement, and the loudness part of it is based around Leq measurement emplying the K-weighitng, which is a very specific frequency weighting developed buy the communication research centre (Transom, 2016).
Loudness, K-weighted, relative to full scale (LKFS) is the loudness standard designed to enable normalization to audio levels for delivery of broadcast TV and other videos. Loudness units are relative to full scale (LUFS) is a term for LKFS that was introduced in EBU R128 . Loudness units (LU) is an additional unit which is used when using EBU R128. It describes LU without direct absolute reference and therefore describes loudness levels and their differences (Broadcast Standards, 2017). Having these standards is crucial for all TV, movie, and audio formats.
Whats the point?
There is a major importance with having these standards for broadcasting networks as if we didn’t the levels on TV and movies would constantly change. Imagine sitting at home watching TV and constantly having to change the volume of the TV (Broadcast Standards, 2017), it would be extremely annoying for people watching, and would lead to non-stop complaints throughout the world.
This video gives a quick in depth look into understanding loudness standards:
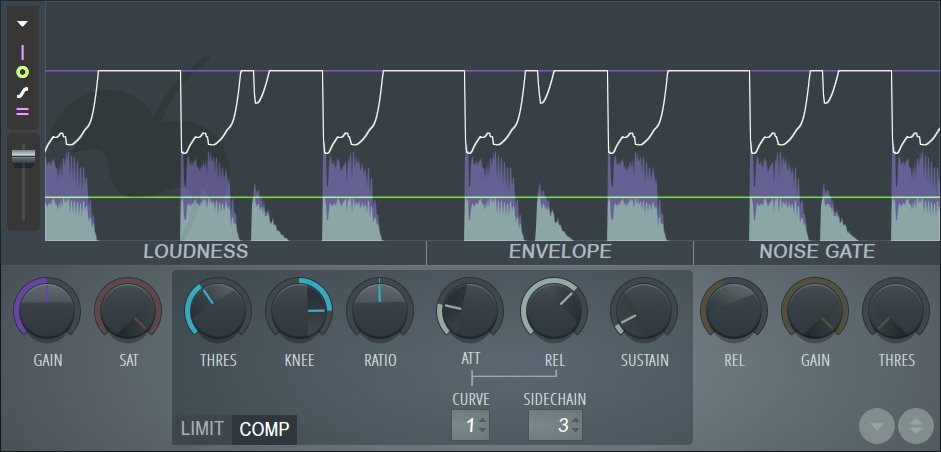
I have been working on a project recently for a artist where I have produced his latest EP for him. He expressed to me the idea in the future, if he gets the opportunity he’d love to upload the EP or a few of the songs to Spotify. Knowing this I figured id have to put his songs onto the spotify loudness standards.
As you can see on the image above the standard playback level for Spotify is -14LUFS (Mastering The Mix, 2017). This identifies that I will have to master his music to this level. On a side note it is a good sign that Youtube and Tidal are also at this playback level, so say he wanted to make a music video and put it on Youtube for one of the songs, it wouldn’t be an issue.
There is a plugin called LEVELS which I have used to figure out how to get the levels for his songs to the needed Spotify playback level:
This video gives detail on how to use this plugin:
This blog is going to have a look into the types of contracts and their purposes in the creative media industry
What is a contract?
A contract is basically a promise between people. It is a clear understanding, a deal between two or more people or a production organisation to do certain things. Either the people or organisations who agree to do something apart of a contract is called a party.
The agreement, or a contract, outlines what you and the other person/s or organisations have agreed to do. It is a very clear, distinct list of promises that have been made between the parties. The best form of contract is mainly written on paper and is always signed by each side of the party (Arts Law, 2017).
There are multiple types of contracts that take place:
Entry forms: when you or a group of members enter an exhibition, festival or competition
Consent / Release forms: when you agree that someone has the right to show images of you or your work to the public
Gallery agreements and publishing licences: When showing work in a gallery, or when your work is published to a larger group of people
Funding agreements: when you receive funding from another party
Studio agreements: When you working in a supported studio or a program run by an organisation (Arts Law, 2017)
There are a ridiculous amount of scenarios that can take place when working in the creative media industry. The type of contract that is made in the field that I am interested in is generally a studio agreements contract. An example of this would be:
An artist is asking for my help to record an album in my studio. I agree to help this artist record his or her album, for a charge of $20 per hour, and a minimum of $200 all up. She agrees to this so we both sign the contract, and then we can begin the process of recording the album in my or my organisations studio.
There are many situations that can expand a contract. In the scenario I put above, if there was a part of the agreement that I make money off when the artist sells the product, I could make a large part of the money that the album sells (I love that film, 2015). Although if the artist makes $0 off the album, I make $0 off the album. This is only the situation if there is an agreement in the contract that regards this.
In my the creative media industry there are many contracts. Though I have not currently done any contracts regarding my work, there is no doubt in the future I will definitely partake in many contracts, apart of my organisation or clients that work for myself.
For the second part of the trimester I have been working on a project with artist Billy Mcleod. The project is producing an EP for Billy. He only had vocals and electric guitar in his music so far, though for the first week of the project we had to work together to figure out what drums were going to play in the songs, then we also added some other samples such as egg shakers. This blog post is going to go into depth about comparing to industry standards (comparing to the artists who influenced this project), and also reflect on the aesthetic choices we made on this project. The project is going to be up online by the 14th of December 2017.
The guitar rhythms and effects that Billy uses shows a very distinct sound that lots of indie/lo-fi rock artists use nowadays. The biggest influence that we have expressed from the start of this project is Mac Demarco.
Although there is still a lot of differences between Billy and Mac Demarco’s music there is also a fair amount of similar characteristics. Particularly in the way that Billy plays his guitar and the effects that he uses on the guitar. The first step to getting the sounds that we wanted from the guitar all started from the amp settings. On the amp we’d put reverb, delay, the classic blues setting, and turn a few other nobs. Doing this was the beginning of the process that we needed to get the similar sound to Mac Demarco. As Mac Demarco has a very distinct sound we didn’t want to 100% copy him, so we did have a slight few changes to his amp set-up. It was when mixing that we had to change a few things to make a somewhat original sound out of similar tones to Mac’s guitar.
Changing The Pitch
When mixing the guitar I used the MAutoPitch plugin to help achieve a sound that we were looking for. I took the guitar recording that we had and put it up 1 note that it already was. This gave the guitar a very interesting sound, leaving it with something that was a long the same lines as Mac Demarco. At first I really wasn’t fully positive about this decision, but I still had a feeling it was better when moving it up a pitch, the the original sound that we had.
Looking back at this, I personally think it was a really good choice to make. The pitch of the guitar was at one that had a very versatile sound and made Billy’s music have a interesting tone to it. Thankfully Billy was happy with myself messing around with this and agreed that the pitch was better then original.
Vocals
When working on the vocals Billy had a major influence from his behalf, the artist is Will Wagner from the Smith Street Band. As I honestly was not a fan of this band I had to listen to a fair amount of their music to fully understand what Billy was going for. I discovered that Billy was more going for the same style in lyrics that the singer aimed for.
Listening to the vocals of the singer I figured that his style of singing was kind of like poetry talking, and not really singing. The style of this was something I was going to copy. The artist would go from talking in verses, then singing in lyrics, and this is something that Billy did in his songs.
To try copy this in some way, I ended up putting more reverb onto Billy’s voice in the chorus’ then it had on the verses. This ended up with an outcome similar to the singer Will Wagner.
Although I also needed to create some room between Billy’s vocals as they sometime seemed cramped up. I ended up putting delay onto Billy’s vocals, not a ridiculously amount so the reverb and delay would clash, but a slight amount of delay really worked with the vocals, and somewhat replicated the vocal rhythm/tones of Will Wagner’s.
Drums
The drums were something that we didn’t want to overpower Billy’s vocals. This is also extremely similar to Mac Demarco’s songs. His drums are really there to just fill the space in his songs that would be missing if there were not drums.
As the snare drum and the cymbal were the main parts of the drums being used throughout Billy’s songs, I had their dB levels turned down, below what the guitars were and adjusted their signal waves to a more suitable levels that’d suit the songs. This turned out to be the way that the drums would suit Billy’s songs best, and this is just what they did. The drums really seemed to fill the parts of Billy’s song that were missing, just like Mac Demarco’s.
Overall Reflection
Overall the result that we have gotten are basically what we wanted. We aimed to get similar sounds to these artists, and we have reached those goals. The guitar ended up sounding different to Mac Demarco’s, but you can still definitely sound the inspiration which we got from Mac Demarco. The vocals that Billy sing in the songs, really stand out in the songs and this is something that we really wanted to happen. All up we are really excited to release this EP to the world, and hope people who listen to Mac Demarco and The Smith Street Band can appreciate the music we have made.
When recording the guitars for some demo-tracks the two guitarists outlined how they wanted to record the guitars by having the drum beat in place. Though the drummer didn’t have the exact beats for the song, although was able to play the song with the rhythm guitarist also playing. This blog is going to outline how I made this all work, plus another few performance corrections I had to make when recording this demo.
As the band had not played this song a lot of times but wanted to get a demo of it recorded, they needed to use a process which would work for each player of the band. As the drums were not able to be played without the guitar, but the guitarist wanted to record the guitar over the drum beat, we had to find a way to make this work. So what my suggestion was, was to get a recording of the guitarist playing the song, and then to get the drummer to play the drums over that beat, until a good recording of the drums were recorded. Once this was recorded we deleted the original guitar track and then the guitarist had the drum beat they were able to play over. This us left with a decent recording, where we then had the lead guitarist play over, and added a few other samples into the track.
The next stage of this process was recording the vocals. The singer was honestly not 100% confident with his vocals when it came to recording. When he played live gigs he was fine, but there was something that when he was recording the he got really nervous about. I used two pro tools plug-ins to help him gain confidence when recording the vocals.
Softube Tsare
I used the softube tsare reverb plug-in to help gain the singers confidence a bit. by adding small amounts of reverb to his voice, it gave his voice a bit better sound to it, especially in his headphones. I added a bit of 1.5 seconds of reverb time to his voice, a tiny bit of delay, and eventually made the headphone mix a tiny bit drier. This gave the singer a major boost in confidence, as he knew what he was singing sounded good, and being able to hear that in the headphones gave him the opportunity to sing comfortably.
MAutoPitch
I also used the plugin MAutoPitch to put his voice up one note higher then it originally was. Giving the singer another boost in confidence. When mixing we didn’t ended up leaving it in this pitch, but put it back into the pitch that he originally was singing in as it sounded better. Although using this plugin in the headphone mix gave him another boost in confidence just like the reverb plugin.
All up the performance correction described in this blog ended up giving the band a better song to mix with for their demo. Giving the band confidence what they needed really did help them with what they wanted to achieve, ultimately getting the best recordings possible.
This blog posts relates to how I recycled one of my hi-hat samples to give it to a guy wanting a hi-hat sample for a hip hop track.
Just before mid trimester break I was sitting in one of the spare computer rooms working on one of my mixes for a side project, and was approached by a guy wondering if I had any drum samples that he could use for a project. I went through my files on my hard drive and found a hi-hat sample that he really liked (think it was from trimester 3) and told him i’d mix it for him as it would give me the opportunity to get this LO ticked off. The hi-hat sample was pretty slow and didn’t have a very bright sound to it. He asked if I could make the sample a bit faster, and have a brighter sound to it. This mixing process for myself was quite fast as it was only one sample that I was recycling.
First as he wanted the sample to bit a bit faster, I got 2 hits of the hi-hat, took out anything that was in between them and put them closer together (around 2 seconds for each hit on the hi-hat). After doing this I copied and pasted them one after another so he had about a 2minute sample of the fastened hi-hat and he wanted.
The hi-hat was sitting at an EQ of around 200kHz, which made it had quite a muddy sound to it. I first used a high-pass filter to boost these to around 100kHz, which got rid of the unwanted muddy sounds that were taking place in the sample.
Although the guy wanted the sample to be faster, it sounded like in the sample there wasn’t any room in between the hi-hats. I used delay to make it so there was a bit of room in between the hi-hats. At first I tried using reverb but it was creating a sound that was quite unpleasant and I don’t believe would have fit what he wanted, the sound was quite washy. The delay gave it a much better sound.
The sound of the hi-hat ended up being completely different to what it originally was. I asked the guy for feedback on it a week or so later and he said it fit into his mix really well. All up recycling the audio for this product was a good outcome.


 This video gives a quick in depth look into understanding loudness standards:


